This is Part II in our series about Pinterest. Read the prior article on why I love Pinterest and how it will save you hours and days of wedding planning grief.
Now that you want to use Pinterest, here’s a guide to getting started with it. It’s a fairly long tutorial but there are lots of photos to guide you along the way.
You’ll be so top of your wedding planning, you could plan a friend’s too!
Signup to Pinterest
1. To signup with Pinterest, you actually need to “request an invite.” It’s a snotty way to get new people as the system will decide who to accept. The good news is that most people get an invitation code.

2. Once you have your invite you can go and login and fill out your details.
3. On the settings page, you can decide how you want to connect to Pinterst and write in your profile description.
4. It’s up to you if you want to ‘link’ to your Facebook and Twitter accounts. If you don’t know what this is then leave the button in the ‘off’ position.
The Add+ Tab
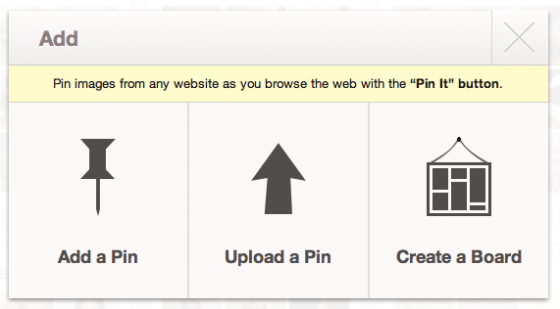
The Add+ tab, located in the upper right corner of the screen, allows you to add a pin from a url address, upload a photo, or create a new board.
··· Create a Board
Go to the Add+ tab in the upper right corner.
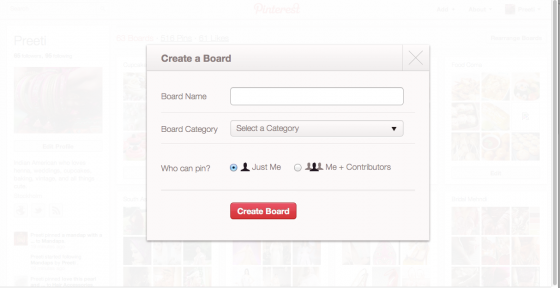
Then with the popup dialog box, click on the “create a board.” Now you can name your board, like Henna or Wedding Gowns. Then select a category; that means the category the board will appear for other Pinners. The third option, ‘who can pin?,’ means whether you want the board to be collaborative so other pinners you give access to can pin or you only allow yourself. I choose just me unless this is a collaborative board with friends/family.
··· Upload a photo
Click on the Add+ tab and then the upload a pin box. You will then get a upload a pin dialog box where you can select a file on your computer to upload.

··· Add a Pin
The add a pin option allows you to add pins you find on the internet. This is not the easiest way and later on I will show you how to add pins faster and more easily.
First, put in the URL where your image is and then click, “find images”.

The box will expand and below and will show you images found on the page, the board you want to add the pin to, and a small description.
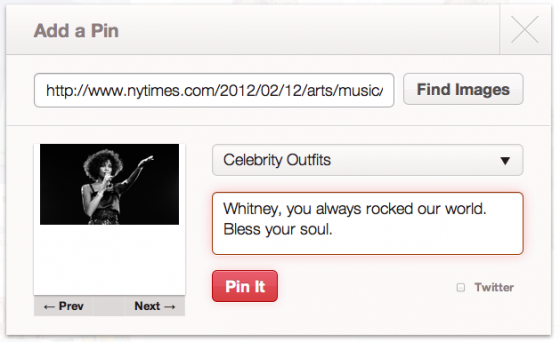
Once done with picking your photo and board click on the “Pin it” button.
The Main Tabs – Finding Pins
This is where the fun is: repinning photos and videos. The main tabs, located at the top of the screen in the middle and right under the logo, are your main navigation points to get around and find new pins.

There are five tabs: Pinners you follow · Everything · Videos · Popular · Gifts. For now, we will ignore the video tab.
··· If you are on the “Pinners you follow” tab (the text will be in bold), you will see recent pin that your friends pinned or uploaded themselves.
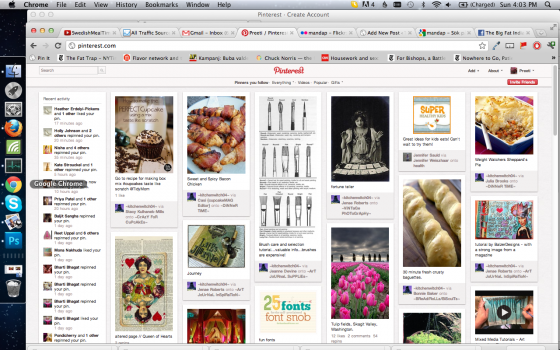
··· The “Everything” tab turns into a drop down menu where you can choose from dozens of categories. This is a great place to start your wedding planning. To get started, head to Hair and Beauty and Wedding and Events.
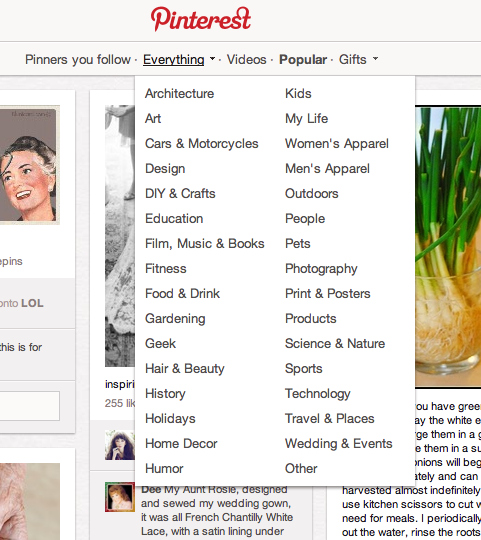
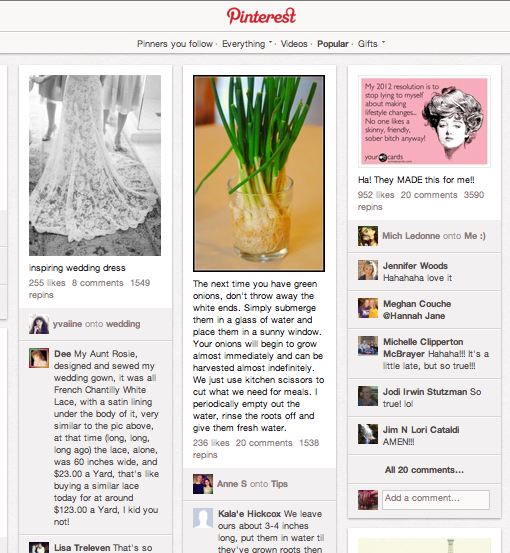
··· You can also see the “Popular Pins” by clicking on the text in the top center, under the logo. The popular pins will be quite different as these are the pins that have been repinned the most recently.
··· The last, and least used by me is the “Gifts” tab. The Gifts tab give you several options to sort by price range. Pinterest figures the price of the item by reading the descriptive text of the photo. For the most part this works but for foreign currencies or weird amounts (if ‘$1 million’ was written) then the photo is tagged with the wrong price tag.
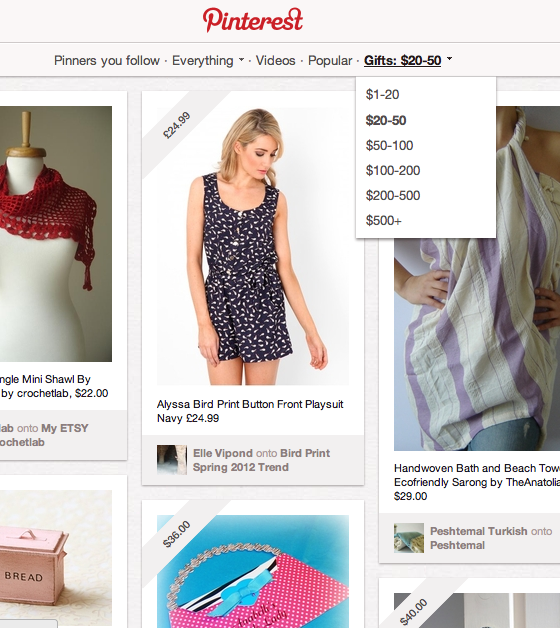
The there is one benefit of the gifts section: when you want to buy gifts for the in-laws or your bridesmaids. Most of the items listed in the Gift tab are through Etsy vendors. If you buy through Etsy, you will be supporting small, artisan businesses while also giving handmade gifts. That’s a cool way to be good to small businesses.
Repin a Photo
To repin a photo, just click on a photo on any page you’re on in Pinterest. This will load a lightbox popup with the image in a large and details about the image.
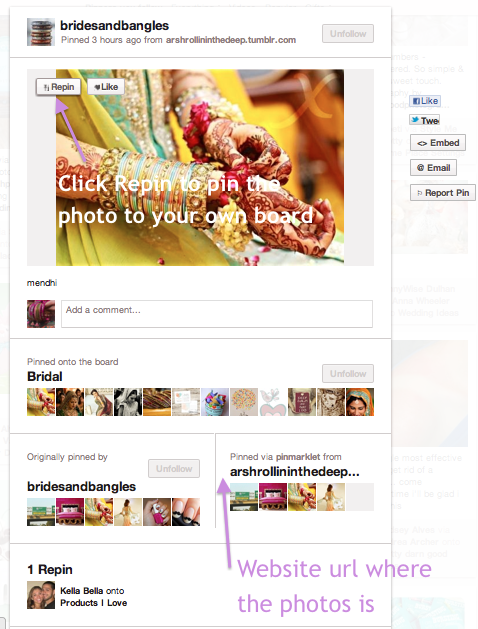
To repin, click on the upper left part of the image. You will magically see two buttons appear: Repin and Like. Click on the Repin and then choose the board you want to add the pin to.
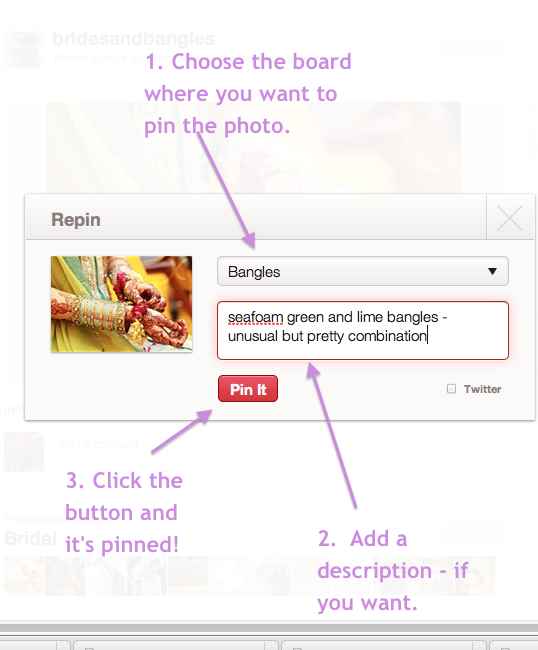
You can also ‘like’ the image (for the ones you love the most) or make a comment. Please note, these comments are public.
The Search Box to Find Photos
The search box is your best friend when finding photos when you are getting started.
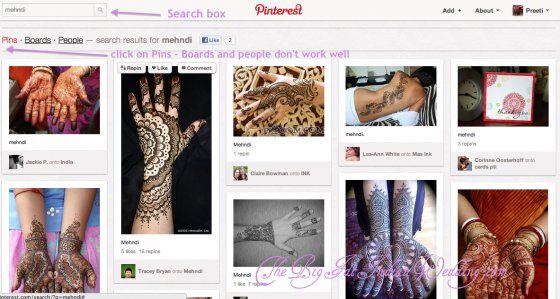
When you search, you can find photos by pins, boards or people by clicking on the red text under the search board after you made your search.
I have noticed that the boards and people never work properly and yield limited or no results. Stick to the search by pins.
This should give you a basic overview of how to navigate around Pinterest and get to pinning photos.

Pinterest is great, love it!
Wonderful tutorial. This will really help with planning.